GF Ravioli and Raw Zucchini Ribbon Salad

GF ravioli
Believe or not, I’ve never ordered ravioli or any other pasta dishes at Italian restaurant. I remember when I went out with work people for Christmas party a few years ago. We all went to this very popular Italian restaurant in town. Well some people ordered pizza, pasta, lasagna, you know all the traditional Italian foods. I ordered a bowl of salad (a safe option for being gluten-sensitive) and Daniel ordered a steak. Everyone laughed at us not ordering any Italian foods at Italian restaurant. I still don’t order those although they offer a gluten-free option. It tastes quite heavy to me. When I was browsing some food blogs, I came across this blog called “Dolly and Oatmeal” based in NY. Her blog has beautiful photographs and simple recipes that I fell in love. This ravioli is inspired by her.

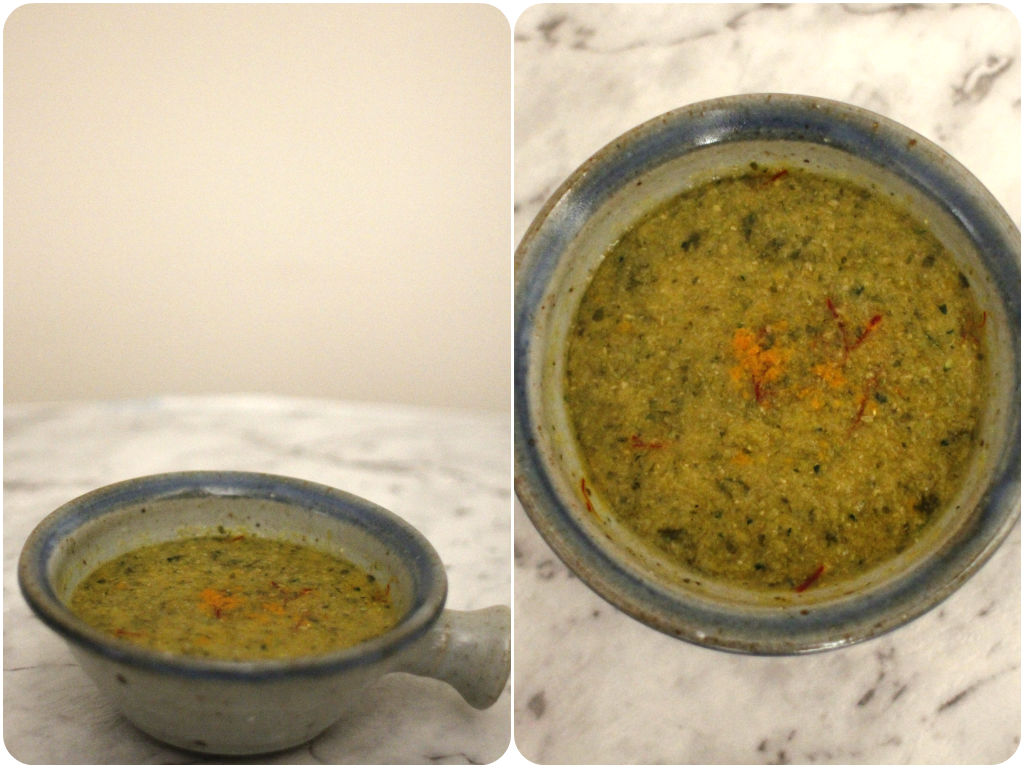
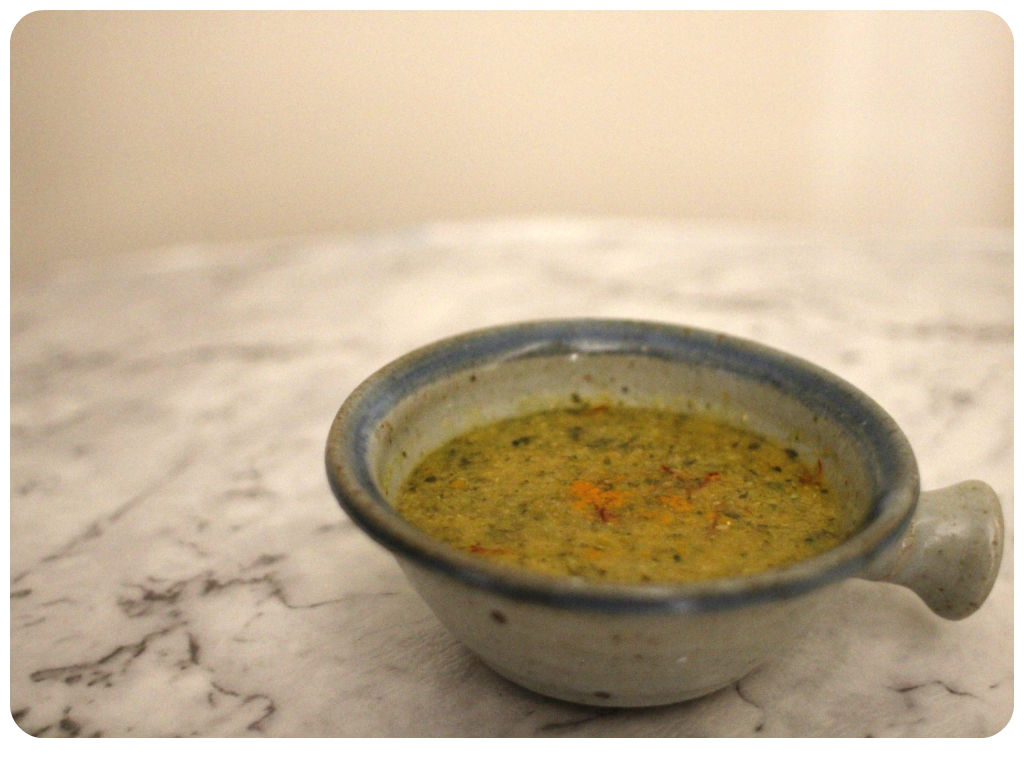
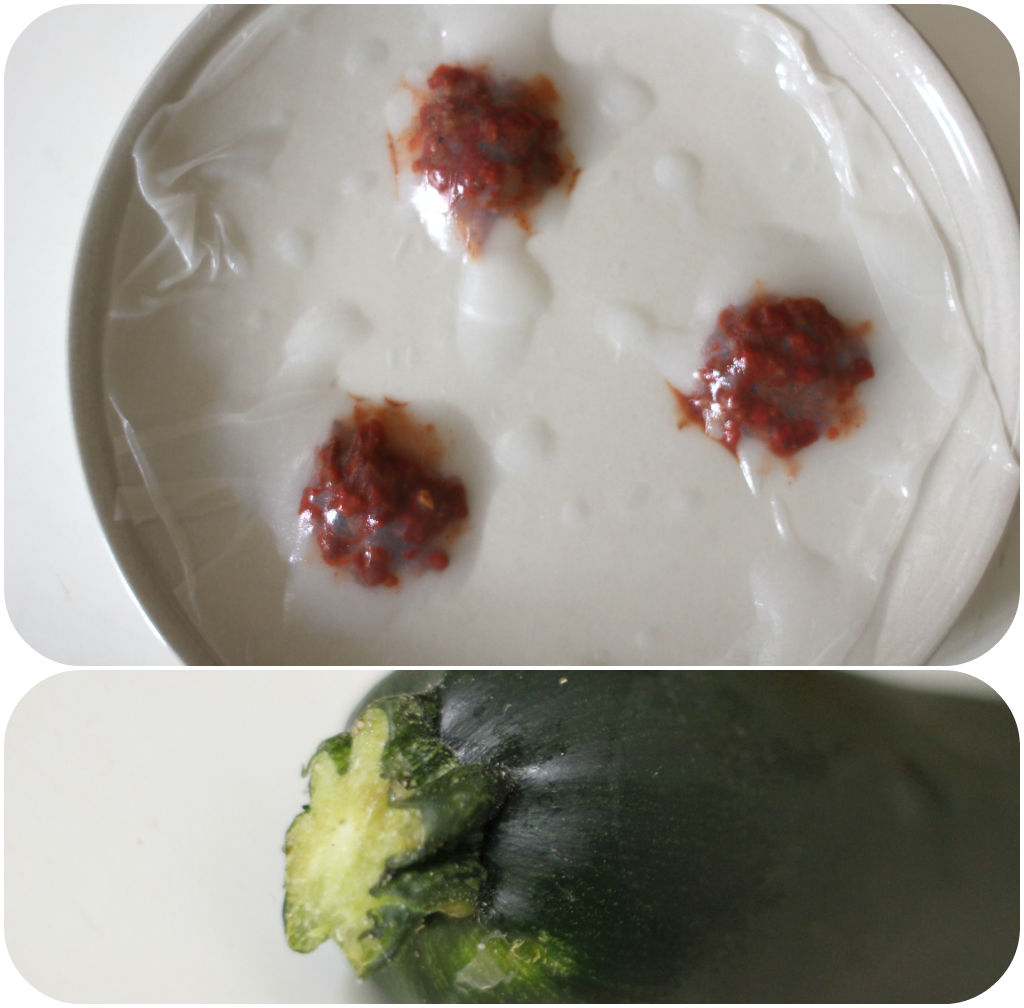
You should all have some leftover rice papers in your pantry. Well I do! If you don’t, you can get them from any Asian groceries or in the Asian food aisle at the local supermarket. Handling rice papers can be a little bit tricky because it gets sticky and messy when you dip it in water too long. So you might need to play with it and practice until you get the hang of it. I like making rice paper rolls using fresh crisp vegetables and now making this gluten free ravioli! You can put any kind of fillings such as pesto, cheese, tofu, etc. I had a jar of chilli-capsicum chutney made up in the fridge, so decided to try with it. The bright red colour actually went so well with the green zucchini salad.

GF Ravioli1
Ingredients

For the ravioli
Rice papers

Fillings
Dried chilli
Char grilled capsicum
a teaspoon of coconut oil
a teaspoon of smoked paprika
a teaspoon of cardamom powder
Himalayan salt

For the salad
1 zucchini
1 cup of arugula leaves
1 cup of sliced celery
a teaspoon of fennel seeds

Maple vinaigrette
a table spoon of coconut vinegar
a teaspoon of e.v.o.o
a teaspoon of maple syrup
a teaspoon of cayenne pepper
a squeeze of orange juice
salt and pepper to taste

Dip the rice paper in water until soft and set it on the plate. Put dollops of chutney fillings on the rice paper. Dip the second piece of rice paper in water and then put it over the bottom piece. Get rid of air bubbles using a knife to make little cuts and create a seal around the filling. You might want to use a bit of oil in your finger to handle the rice papers since it can be quite sticky. Use a cookie cutter or a sharp knife to cut the ravioli. For the salad, I simply mixed ribboned zucchini, sliced celery, arugula leaves and fennel seeds. Then tossed with the maple vinaigrette. A beautiful fresh summer salad! You can make this to impress your loved ones or it is a perfect entree on a special day.

Chilled Green Soup

Chilled Green SoupI probably have a bowl of soup 4-5 days a week in winter. That’s how much I like a hearty flavoursome soup, but having a soup in hot summer is a bit of challenge. I made this cold soup with leftover veggies in the fridge. It’s a great way of using up the leftover, especially all the tough stems of celery, broccoli, coriander, spring onion, leek, etc. Do not waste those bottom bits because there is so much goodness in them and they actually taste awesome. You can make a chilled soup like this or use for making your own vegetable stock.

Okay, I added some spices for a kick, but leave them out if you want. You can also strain the soup after pureeing for a smooth silky soup, but I actually like a bit of texture and fibre in my soup, so I skipped that step. If you are into a creamy rich soup, add more dairy like milk and creme. I just topped with a pinch of saffron here, but for a more crunch and flavour, you can add some roasted nuts or roasted pancetta. Enjoy x

Chilled Green Soup2Ingredients

1 chopped onion
1 cup of broccoli
1 cup of celery
1 cup of zucchini
a handful of coriander stem
3 cloves of garlic
1/2 teaspoon of turmeric
1/2 teaspoon of cayenne pepper
a pinch of saffron
1 teaspoon of coconut oil
stock or watersalt and pepper to taste

Cook chopped vegetables with coconut oil in a large pot until cooked. Season and add turmeric powder and cayenne pepper as they cook. Add stock or water, bring it up to boil and simmer for 10 minutes. Turn off the heat and let it cool slightly. Puree the soup with a stick blender. Pour into soup bowls and sprinkle saffron. Chill the soup in the fridge for an hour or more. Top with a dollop of creme before serve if you wish.

“Flavoursome” Soy Sauce

We all use soy sauce as a staple condiment when we stir-fry, make an Asian salad dressing, use as a seasoning, and flavour a soup, etc. I remember my grandma and aunties used to make all condiments at home from soy sauce to Deonjang. It seriously doesn’t smell good in the house because of the fermentation process happening in them, but you cannot compare the home-made soy sauce to store-bought ones. Its complexity, flavour, earthiness, saltiness, caramel-like.. You wouldn’t believe how good a soy sauce can be. I unfortunately buy a bottle of soy sauce from the shop now since I cannot bring it all the way from Korea. However, there is a trick you can do at home. A little magic that turns a boring soy sauce into a beautiful “flavoursome” soy sauce.

So What is soy sauce? It is made from fermented soy beans mixed with some type of roasted grain (wheat, barley, or rice are common), injected with a special yeast mold, and liberally flavored with salt. After being left to age for several months, the mixture is strained and bottled. Not all soy sauce is same. Depending on methods and process of fermentation and ingredients (water, salt, soy beans), the flavour can vary. Traditionally Korean households used to brew their own soy sauce and some still do, but people tend to get a bottled one from the shops as a faster and less expensive choice.

From its fermentation process, soy sauce is rich in antioxidants, isoflavones, protein, and even a small amount of fiber. It also provides digestive tract benefits. One tablespoon of soy sauce has roughly 11 calories, 2 grams of protein, 1 gram of carbohydrates, and 1006 mg of sodium. It is better to look for traditionally made ones for health benefits. So go to natural food stores and find “certified organic”, “additive-free” varieties. If you have a wheat sensitivity, you can choose to buy “tamari” which is a soy sauce without wheat in it. If you have blood pressure or cardiovascular health problems and need to watch out a sodium intake, go for a sodium reduced version.

Now onto this “flavoursome” soy sauce. Pour 100ml of soy sauce, 50ml of cooking wine and 100ml of water into a pot. Add flavour agents – fruits and vegetables such as onions, garlic, spring onions, leeks, chillies, apples, pears, bay leaves, peppercorns. Just like when you make a stock at home, bring it up to boil and simmer for 30 minutes. Let it cool, strain the sauce and transfer to a bottle. Keep it in the fridge and use when you need. I made a bottle yesterday and tried on my tofu – delicious! I recommend making your soy sauce more interesting at home like this. You will taste the difference, pack of flavour 🙂

Spicy Rice CakesKorean Spicy Rice Cakes

Ingredients

1 cup of rice cakes
1 cup of shredded green cabbage
1 green onion
1 carrot
1/2 cup spring onion
a cup of water
1 table spoon of Gochujang (Korean chilli paste)
1 table spoon of chilli flakes
1 table spoon of white wine vinegar
1 table spoon of honey
1 table spoon of “flavoursome” soy sauce
1 teaspoon of sesame oil
1 teaspoon of sesame seeds
salt and pepper to taste

Soak rice cakes in water for 30 minutes to soften. Clean and chop all vegetables so they are ready to go. In a little bowl, make the spicy sauce by mixing Gochujang, chilli flakes, vinegar, honey and soy sauce. Stir-fry vegetables in a hot pan and cook about half-way through, then add rice cakes, a cup of water and spicy sauce. Stir well to combine and simmer for 10-15 minutes until all ingredients are cooked and the sauce is thickened. Add salt and pepper to taste. Drizzle sesame oil and sprinkle sesame seeds on top before serve.

Pumpkin Baby Cakes with Sage

Pumpkin cake

Looking for a light lunch or healthy snack or finger foods in your party? Easy to prepare and make? Freezer friendly food? Delicious? Yes to all! These little pumpkin baby cakes are awesome.

It is definitely a budget meal. You already have a piece of pumpkin and eggs in your fridge, and other ingredients in your pantry. Quick and easy! Mix all up, shape into patties and cook in a pan. It takes no time. Leftovers can be kept in freezer for months. Just take them out and heat them in the oven before serve. Pumpkin and sage are a match made in heaven. You can put sage leaves on patties while cooking in a pan like me or fry sage leaves separate for more crispy intense flavour. Yum!

Ingredients

1 cup of grated pumpkin
1 cup of buckwheat flour
2 eggs beaten
1 teaspoon of nutritional yeast
1 teaspoon of minced garlic
1 teaspoon of cumin
1 bunch of sage
a teaspoon of coconut oil
salt and pepper to taste

Place all ingredients in a mixing bowl and fold to combine until they come together as a dough. Take a small amount and roll into a patty shape. Heat a pan over medium heat and add a drizzle of coconut oil. Cook patties with sage leaves for 4-5 minutes each side until golden. Serve with salads.


Raw Rainbow Salad and Irish Soda Bread

Bread-making classDaniel and I went to “Less is More” festival in Peppermint Grove yesterday to attend a bread-making class. I was pretty excited about that because I make my own bread at home, but never really learned how to do properly. The lady explained about types of yeast, other ingredients for bread-making, history of the bread, how to make a loaf of bread using a bread maker and a recipe for Irish soda bread. Surprisingly class was so full although it was early Saturday morning. Beautiful smell of the bread from the oven made us so hungry. We went down to Kakulas Sister’s in Fremantle after the class to get some flour, beans, nuts and grains since I was running low on those in my pantry. I love that little place, full of exotic stuff that you cannot find at the supermarkets. I had to try out the printed recipe I got from her. So here it is. Irish soda bread!

Rainbow SaladIrish Soda Bread

100g country grain flour
100g plain flour
1 teaspoon of salt
1 teaspoon of brown sugar
1 teaspoon of white wine vinegar
1 teaspoon of baking soda
half cup of milk
half cup of olive oil

Mix all dry ingredients in a mixing bowl. Stir well making sure there is no lumps. Then add wet ingredients into the bowl. Baking soda and vinegar will do their thing and bubbles will appear. Then pour the mixture into a baking tin and put it in the preheated oven (200) for 20-30 minutes until all cooked through.

Rainbow Salad2Rainbow Salad

1 carrot
1/2 zucchini
1 cup of green beans
1 cup of shredded green cabbage
1/2 beetroot
a bunch of coriander
a teaspoon of sesame seeds

For dressing
a teaspoon of Dijon mustard
a teaspoon of tahini paste
a teaspoon of apple cider vinegar
a teaspoon of maple syrup
a teaspoon of basil oil
salt and pepper to taste

Wash all veggies and cut into strips. I used a peeler for a carrot and zucchini. For the dressing, mix tahini, mustard, apple cider vinegar, maple syrup, basil oil, salt and pepper. Combine with the salads just before serve.