GF Rawmazing Raspberry Tartlets

Berry Cup
You don’t have to give up on delicious cakes, cookies and pies because you have food allergies. Before I got to know raw desserts, I didn’t have much sweets at all, maybe some ice creams and sorbet if I feel like it. Then I realised I actually have a sweet tooth! Raw desserts are so yummy and full of nutrition. I cannot skip even a day without them. Yes, it is better than traditional desserts which are full of refined sugar and empty calories. Desserts are desserts though. You need to enjoy in moderation since all the ingredients in raw desserts are quite high in calories and fat from nuts, dried fruits and coconut oil/ butter. One of the benefits of raw desserts is to avoid common allergenic foods such as gluten and dairy. It’s made of whole foods, all natural. For this recipe, raspberries are rich in anti-oxidants and vitamin C for boosting your immune system, reducing inflammation, balancing blood sugar levels and fighting against cancer. The crust is mixed nuts and dried fruits which are nutritious and leaves you full for longer. This dessert is easy to make, sweet, tart and full of delicious fat from coconut oil and nuts.

Ingredients

For the base
5 Medjool dates
1 cup of almonds, walnuts and cashews
a teaspoon of cinnamon
a teaspoon of nutmeg
a teaspoon of vanilla extract
a table spoon of coconut oil
a pinch of salt

For the filling
a teaspoon of chia seeds
1 cup of raspberries (fresh or frozen)
1 table spoon of maple syrup
a table spoon of coconut oil
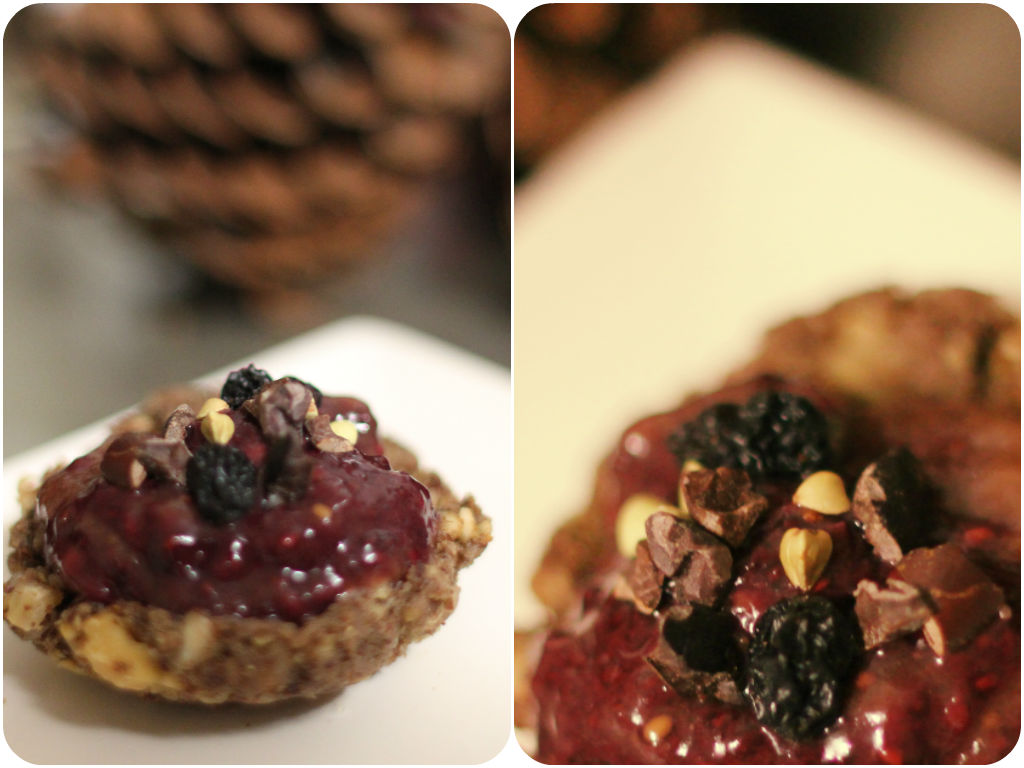
cacao nibs, raisin and buckwheat groats for garnish

Blend all ingredients for the base in a food processor. Add a bit of water if the mixture is too crumbly. Press the mixture inside the tartlet mold and put it in the fridge to set. For the filling, blend rasberries, chia and maple syrup until it’s thick (chia will make the mixture thick over time). Spoon the filling mixture into the tartlet base and top with some crunchy goodness. Keep them in the fridge. Thanks to the magic of coconut oil, they will set in a few hours.

If you want to go nut-free, substitute the 1 cup of nuts to 1/2 cup of pepitas (pumpkin seeds) and 1/2 cup of shredded coconut. You can absolutely choose to use other fruits, blueberries, strawberries, mangoes. I love using cinnamon, cardamom and nutmeg in the base, but skip them if you are not a fan of them.

Tropical Morning Smoothie

Mango Smoothie
Quick delicious breakfast smoothie for Daniel this morning. I asked him “Do you know what the yellow things are on top?”. He responded “Ah…nutritional yeast flakes? (he saw my previous post on zucchini chips)”. Nope, it was bee pollen? What the heck is that?

Bee Pollen is made by honeybees, and is the food of the young bee. It is important to recognize that a one teaspoon dose of pollen takes one bee working eight hours a day for one month to gather. Each bee pollen pellet, contains over two million flower pollen grains and one teaspoonful contains over 2.5 billion grains of flower pollen. Aren’t we so cruel stealing these goodness from poor bees >.<

So what is good about these yellow granules? Bee pollen is a complete food and contains many elements that products of animal origin do not possess. Bee pollen is more rich in proteins than any animal source. It contains more amino acids than beef, eggs, or cheese of equal weight. About half of its protein is in the form of free amino acids that are ready to be used directly by the body. It’s good for your skin, energy level, immune system, skin and digestive system. It’s also thought that ingesting pollens will help the body to build resistance to these potential allergens and, in turn, reduce allergy symptoms. However, if you have a pollen allergy, you need to be cautious since it can lead to potentially life-threatening anaphylaxis.

Bee pollen has a sweet powdery, floral taste. Pollen stored in a cool dark place should keep for a year. I bought a little jar from Bee house in Swan Valley for the first time. Then I’ve ordered a big batch from on-line health shop, which last me for a while. You only take a teaspoon at a time over your breakfast cereal, yogurt, smoothie, or just by itself.

To make this smoothie, I blended a cheek of mango, 3 medjool dates, a cup of milk, a teaspoon of maca powder (another stamina enhancer! I will get to that next time) and a teaspoon of bee pollen. If you don’t like milk, replace with non-dairy drinks or coconut milk or coconut water. Beautiful tropical flavour!

Oven Baked Zucchini Fries

Have you heard of nutritional yeast before? Don’t get confused with brewer’s yeast for beer or dry yeast for bread. They are not the same! I didn’t know how to use these yellow flakes until now.

It’s used by vegans and vegetarians since it has a good source of vitamin B12 that is lacking in a vegetarian diet. Not only is it delicious but it is a fantastic alternative to cheese. It contains low sodium, low fat, no sugar, 18 amino acids, and vitamin B. Its yellow colour comes from Riboflavin (vitamin B2), important for proper use of oxygen and metabolism of fatty acids, carbs and fatty acids. Nutritional Yeast also contains Niacin, Thiamin, Biotin, and Folic Acid as well as minerals, Selenium, Chromium, Zinc, Phosphorous, Magnesium, and Potassium, plus beta-1, 3 glucan, a type of fiber that may aid the immune system and help to lower cholesterol. It is the perfect supplement for any vegan or vegetarian lifestyle. A common use is to sprinkle some of the flakes on popcorn, soups, salads, pastas or baked potatoes much like you might add salt or pepper.

I tried a half teaspoon by itself and surprised how much it tastes just like Parmesan cheese. Then I nod. I wish I knew about these magical flakes a lot earlier. It’s creamy, cheesy and yummy! I couldn’t wait to use this on chips. Ah, sorry not talking about those deep fried potato chips. I meant baked zucchini fries! I am so obsessed with zucchinis. Grill them and mix with beans and salads, stir-fry, stuff them and bake in the oven, make raw noodles, grate and put them in cakes and muffins, dip raw sticks in hummus for snack, WOW what else? 🙂
Zucchini ChipsIngredients

Zucchini cut into fries
1 teaspoon of coconut oil
2 teaspoons of nutritional yeast
1 teaspoon of cayenne pepper
1 teaspoon of Himalayan salt

Other recipes say adding breadcrumbs to cover the zucchini sticks completely. I didn’t have any gluten-free breadcrumbs at home and left it out, but feel free to add some. I’m going to try sweet potato next time, but maybe cut into thinner sticks to get more crispy chips. It was delicious! Try this tonight x

GF Chocolate Bars

GF Chocolate Bar

Who doesn’t like chocolate? When I have a piece of chocolate or chocolate bar from the packet, it tastes sickly sweet, full of sugar and preservatives. You can make a guilt free treat at home with all healthy ingredients and it is actually good for you. Cacao (not cocoa >.<) is raw with all enzymes and powerful antioxidants. Had a bad day? Grab this bar and enjoy a big mouthful! Cacao contains the amino acid and tryptophan which leads to the production of serotonin, a happy hormone. The super bean contains oleic acid which is linked to lower bad cholesterol and a great source of magnesium, iron, copper, calcium, potassium and zinc.

I always keep a bag of raw cacao powder in my pantry and use for baking muffins and cakes, making little truffles, chocolate mousse, chocolate milk, and chocolate bars. Don’t limit yourself using cacao! You can even add to your salad and salad dressing. Sprinkle cacao nibs over salads for extra crunchy and bitter sweet flavour. You will be surprised 🙂

Ingredients (10 mini bars)

100g almonds and hazelnuts
1 teaspoon of cinnamon powder
2 teaspoons of cacao powder
1 teaspoon of vanilla extract
1 table spoon of coconut oil
1 table spoon of coconut butter
5 Medijool dates
1 medium sized banana

Put all ingredients in a food processor and blend until it comes together. If it is too crumbly, add a squeeze of lemon or a teaspoon of water. Pour the mixture into a tin or container and press firmly. Set in the freezer for an hour and then cut into pieces.

World of Scones

SconesI wasn’t familiar with scones until I came to Australia. I remember I tried them at my Pilates teacher’s house a few years back. It was a weekend private course at her house to become a Pilates instructor. She had a beautiful townhouse in Fremantle overlooking the ocean. Her husband was babysitting their grand-daughter during the day. She was so shy saying hi behind her grandpa’s legs and ran away from us. Then about 4pm-ish, we were a bit sluggish after hours of learning and overwhelmed by so much information in so little time. Wanting to have some sugar-kick! This little girl came into the room with a little basket of scones and, of course, jam and cream on the side. She told us she made them for us with a shy smile. How cute! We all sat around the fireplace (it was winter time!) and shared a little scone with her. It kind of looked and tasted like KFC biscuits when I tried it for the first time. Rich buttery taste and soft fluffy inside. It reminded me of the cornmeal bread I used to like when I was little. I’ve tried to bake scones at home several times since then. Sometimes it turns out to be okay, but other times it doesn’t rise, fail! I didn’t realise how hard making scones is. It definitely got harder since I need to make a gluten-free version now, too. My tips for making good scones are…

  • Firstly, use cold butter. Yes, butter. It is better to use butter in scones than coconut oil. As it melts into the dough in the oven, it creates beautiful layers.
  • Add a knob of cold butter into dry ingredients and cut into little pieces with your knife or fork. Then start massaging with your fingers until the dough comes together.
  • Don’t work your dough too much. Otherwise scones will not rise because kneading converts the protein in flour to gluten.
  • Gently fold the dough in half and in half again, a few times to get flaky and layered scones.
  • Don’t pat the edges of the scones after cutting them.
  • Bake them for a short time in high heat. I bake for 15-20 minutes in the 200 preheated oven and take them out to cool.
  • If you have any other tips, please share with me 🙂

Ingredients (make 8 little scones)

2 cups of gluten free flour blend
1 teaspoon of baking powder
a pinch of salt
1 teaspoon of vanilla extract
2 teaspoons of brown sugar
1 teaspoon of cold butter
1 egg
1/4 cup of milk*
1/2 cup of dark chocolate chips for chocolate chip scones
1/2 cup of cooked pumpkin for pumpkin scones

*You might need more or less milk depending on what flour you use and how moist your pumpkin mixture is.