Tofu Scramble

Tofu
Tips for cooking with firm tofu! When you scramble or stir-fry or grill your tofu, having it pressed before cooking prevents too much water coming out and brings out more texture and flavour. Place the slices of firm tofu on top of kitchen towel and another paper towel on top. Put a heavy object like a plate or book on top of that for about 30 minutes while you are preparing other ingredients. After that, you can marinade or add spices to it.

Ingredients

1 block of firm tofu
1 tbsp coconut oil
1 tsp minced garlic
1 small onion sliced
1/2 cup chopped kale (any kind of vegetables)
1 tsp cumin
1 tsp cayenne pepper
1 tsp curry powder
1 tbsp nutritional yeast
salt and pepper to taste
a drizzle of sesame oil to finish

Press the tofu as above. Cook garlic and onion with coconut oil in a pan over medium heat. You can stir in any kind of vegetables here, mushrooms, capsicum, broccoli, tomato, etc. Add diced firm tofu and spices. Stir and cook for about 5 minutes until all ingredients are mixed together. You can smudge the tofu with the back of the wooden spoon to make more scramble, but I left them intact. Add salt and pepper to taste. Transfer to the plate and top with fresh kale or herbs.

GF Black Bean Brownies

Black beansYes, dessert can be healthy yet still delicious! I like putting savory ingredients in sweets e.g. beetroot, zucchini, eggplant, pumpkin, beans. It really fools you! They don’t taste like beans at all, but adds an amazing flavour and consistency. Rich, dark, moist, chocolatey and fudgy. Just the way the brownie should be! Trust me on this. You will fall in love with this after the first bite. From a health point of view, it is gluten-free, sugar-free and guilt-free. This brownie has a good amount of protein from beans and eggs, which means it fills you up and stabilises your blood sugar level unlike other desserts that are commonly full of sugar and empty calories. Great for a breakfast if you have a sweet tooth, a snack with a cuppa, even a satisfying yummy dessert with a glass of red 🙂

Black bean brownie 2Cacao powder – well known superfood. The best source of magnesium and anti-oxidants.
Almonds – high in essential minerals such as calcium, magnesium, potassium, vitamin E
Black beans – very high in fibre, folate, protein, anti-oxidants, an amazing longevity food!
Cinnamon – natural anti-infectious components, contains fibre, calcium, iron and manganese
Chia – very high in fibre, omega 3, a complete protein, anti-oxidants
Maple syrup – an anti-oxidant powerhouse. contains anti-inflammatory compounds, essential minerals like zinc, iron, calcium, and potassium. helps with digestion and muscle recovery

Black bean brownie

Ingredients

1 cup of cooked black beans and adzuki beans
50g almond meal
25g cacao powder
1/2 teaspoon of baking powder
1 teaspoon of cinnamon powder
1 teaspoon of nutmeg
1 table spoon of chia seeds
1/4 cup of coconut oil
1/3 cup of maple syrup
3 eggs
a pinch of salt

Soak dried black beans over night. Wash well and cook in a boiling water until soft and tender. Drain and mash them with the back of the fork. Add all wet ingredients in a mixing ball, and then dry ingredients. Combine well making sure there is no lumps. Pour into the baking tin and bake in the preheated oven (180) for 40 minutes until cooked.

Chia Pudding

Chia puddingI love making puddings for a healthy snack or dessert. Milk tea pudding, panna cotta, sago…but since I started making this chia pudding. Oh my god, it is so simple to make, delicious and packed with nutrients (protein and fibre, yeah!). It is gluten-free and vegan, of course when you use a non-dairy milk. It is so awesome how these little guys turn into sticky pudding texture. You can absolutely play with flavours here. Fabulous flavours? chocolate, banana, cinnamon, mango, berry, Macha green tea, vanilla, pumpkin, chai.. Toppings? crunchy nuts, dried or fresh fruits, shaved chocolate, coconut chips, honey or maple syrup… what ever you fancy!

Ingredients (For one serving)

250ml coconut milk (you can use almond milk or soy milk too, but coconut has lots of flavour and healthy fats)
20g chia seeds
1 teaspoon of vanilla powder
1 table-spoon of maple syrup
1 cup of mixed berries (frozen or fresh)toppings (goji berries, cacao nibs, buckwheat)

Combine all ingredients in a glass or a jar except topping and refrigerate overnight. Stir occasionally making sure chia seeds are not all stuck together. Sprinkle toppings and serve chilled in the morning. It doesn’t get easier than this. Remember. Enjoy every mouthful, stay healthy, be grateful, enjoy your life x

Tropical Morning Smoothie

Mango Smoothie
Quick delicious breakfast smoothie for Daniel this morning. I asked him “Do you know what the yellow things are on top?”. He responded “Ah…nutritional yeast flakes? (he saw my previous post on zucchini chips)”. Nope, it was bee pollen? What the heck is that?

Bee Pollen is made by honeybees, and is the food of the young bee. It is important to recognize that a one teaspoon dose of pollen takes one bee working eight hours a day for one month to gather. Each bee pollen pellet, contains over two million flower pollen grains and one teaspoonful contains over 2.5 billion grains of flower pollen. Aren’t we so cruel stealing these goodness from poor bees >.<

So what is good about these yellow granules? Bee pollen is a complete food and contains many elements that products of animal origin do not possess. Bee pollen is more rich in proteins than any animal source. It contains more amino acids than beef, eggs, or cheese of equal weight. About half of its protein is in the form of free amino acids that are ready to be used directly by the body. It’s good for your skin, energy level, immune system, skin and digestive system. It’s also thought that ingesting pollens will help the body to build resistance to these potential allergens and, in turn, reduce allergy symptoms. However, if you have a pollen allergy, you need to be cautious since it can lead to potentially life-threatening anaphylaxis.

Bee pollen has a sweet powdery, floral taste. Pollen stored in a cool dark place should keep for a year. I bought a little jar from Bee house in Swan Valley for the first time. Then I’ve ordered a big batch from on-line health shop, which last me for a while. You only take a teaspoon at a time over your breakfast cereal, yogurt, smoothie, or just by itself.

To make this smoothie, I blended a cheek of mango, 3 medjool dates, a cup of milk, a teaspoon of maca powder (another stamina enhancer! I will get to that next time) and a teaspoon of bee pollen. If you don’t like milk, replace with non-dairy drinks or coconut milk or coconut water. Beautiful tropical flavour!

World of Scones

SconesI wasn’t familiar with scones until I came to Australia. I remember I tried them at my Pilates teacher’s house a few years back. It was a weekend private course at her house to become a Pilates instructor. She had a beautiful townhouse in Fremantle overlooking the ocean. Her husband was babysitting their grand-daughter during the day. She was so shy saying hi behind her grandpa’s legs and ran away from us. Then about 4pm-ish, we were a bit sluggish after hours of learning and overwhelmed by so much information in so little time. Wanting to have some sugar-kick! This little girl came into the room with a little basket of scones and, of course, jam and cream on the side. She told us she made them for us with a shy smile. How cute! We all sat around the fireplace (it was winter time!) and shared a little scone with her. It kind of looked and tasted like KFC biscuits when I tried it for the first time. Rich buttery taste and soft fluffy inside. It reminded me of the cornmeal bread I used to like when I was little. I’ve tried to bake scones at home several times since then. Sometimes it turns out to be okay, but other times it doesn’t rise, fail! I didn’t realise how hard making scones is. It definitely got harder since I need to make a gluten-free version now, too. My tips for making good scones are…

  • Firstly, use cold butter. Yes, butter. It is better to use butter in scones than coconut oil. As it melts into the dough in the oven, it creates beautiful layers.
  • Add a knob of cold butter into dry ingredients and cut into little pieces with your knife or fork. Then start massaging with your fingers until the dough comes together.
  • Don’t work your dough too much. Otherwise scones will not rise because kneading converts the protein in flour to gluten.
  • Gently fold the dough in half and in half again, a few times to get flaky and layered scones.
  • Don’t pat the edges of the scones after cutting them.
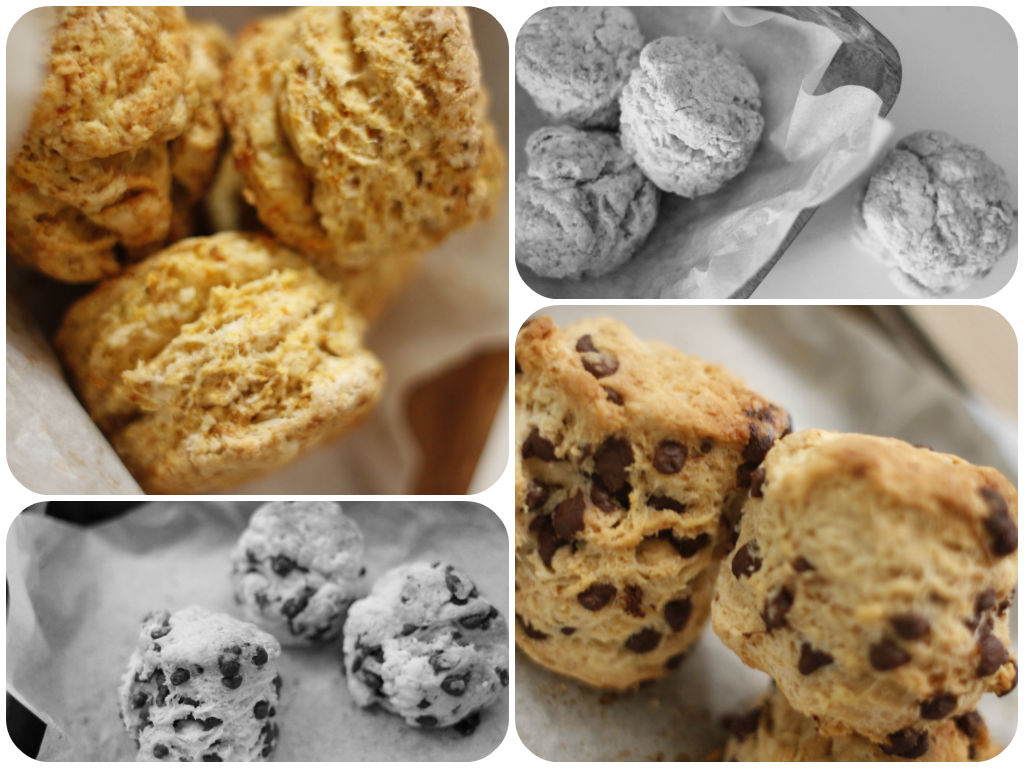
  • Bake them for a short time in high heat. I bake for 15-20 minutes in the 200 preheated oven and take them out to cool.
  • If you have any other tips, please share with me 🙂

Ingredients (make 8 little scones)

2 cups of gluten free flour blend
1 teaspoon of baking powder
a pinch of salt
1 teaspoon of vanilla extract
2 teaspoons of brown sugar
1 teaspoon of cold butter
1 egg
1/4 cup of milk*
1/2 cup of dark chocolate chips for chocolate chip scones
1/2 cup of cooked pumpkin for pumpkin scones

*You might need more or less milk depending on what flour you use and how moist your pumpkin mixture is.