Bulgogi and Wild Rice Pudding

Bulgogi 
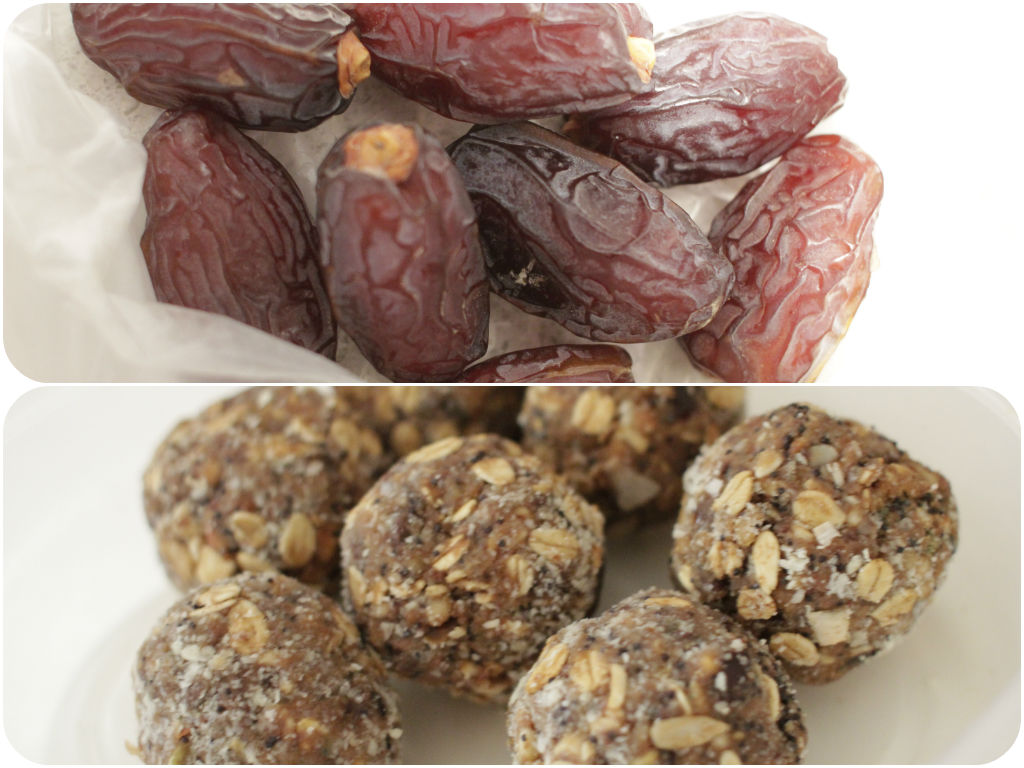
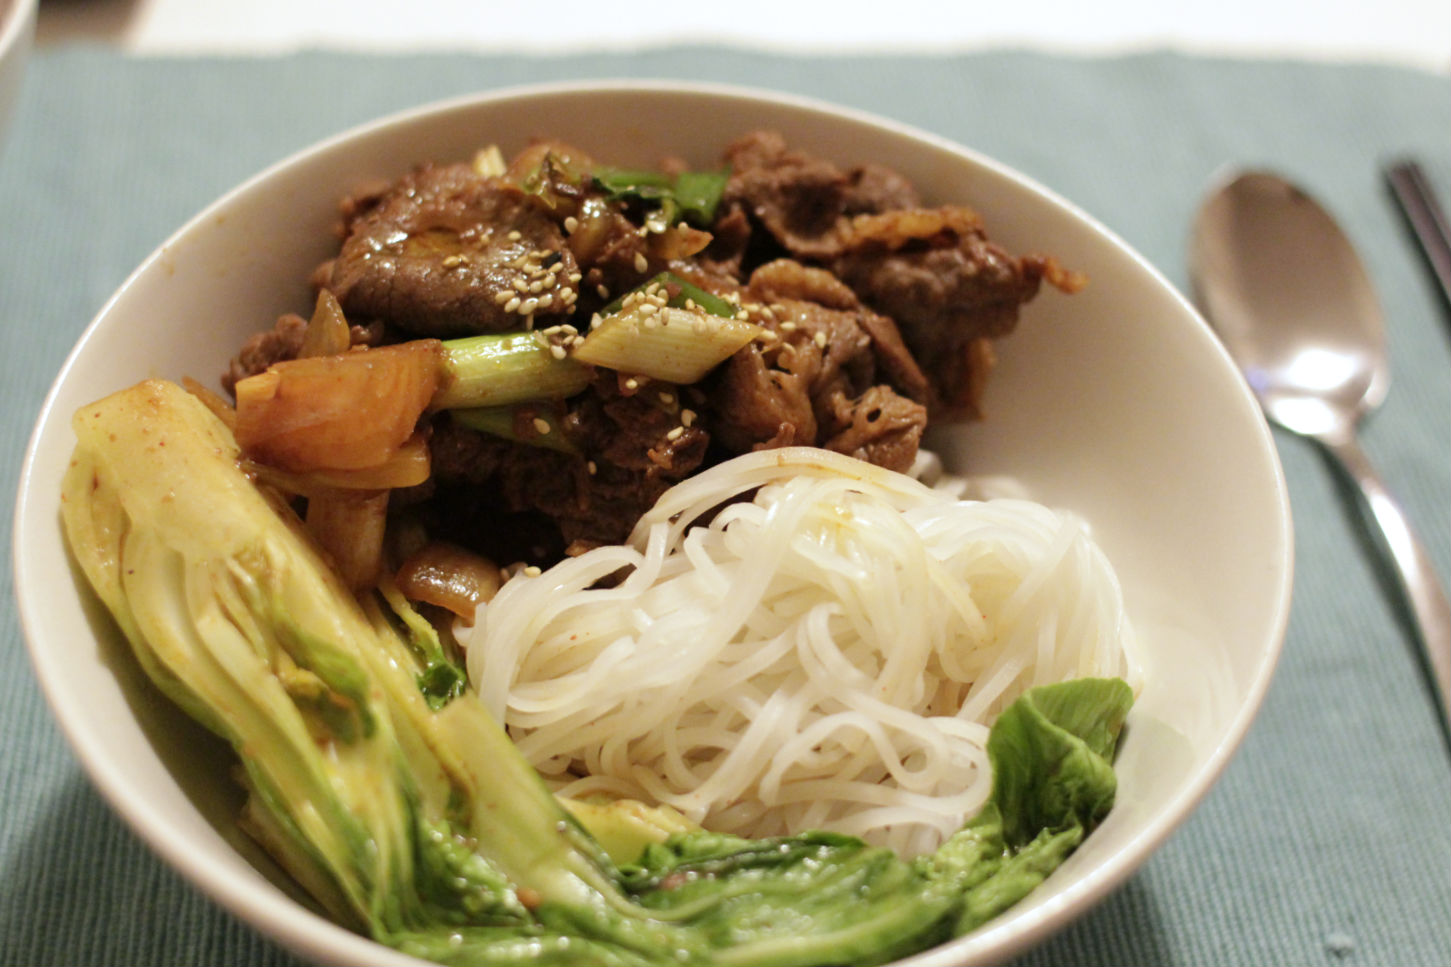
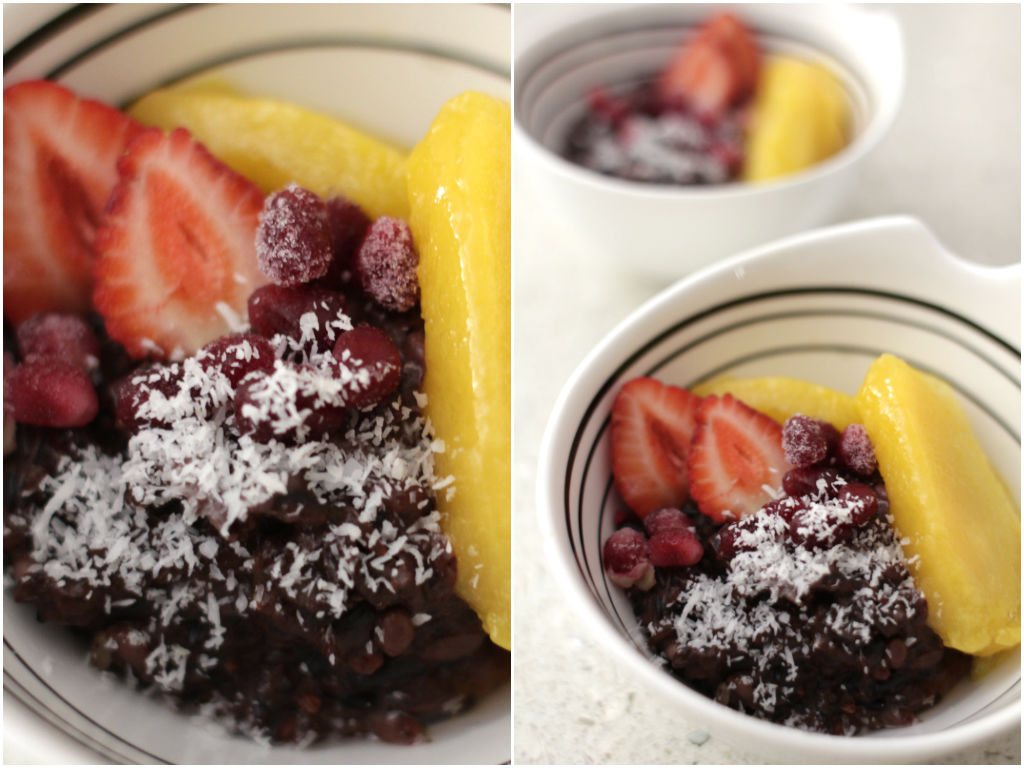
Our dinner tonight is Bulgogi with bok-choy and rice noodles, and wild rice pudding for dessert. Bulgogi is a popular Korean dish, grilled marinated thin beef. I normally marinade the meat overnight in soy sauce, cooking wine, garlic, ginger, onions, chili and sesame oil. When you cook the meat, make sure the pan is nice and hot and don’t crowd the pan otherwise you are stewing, not stir-frying. Add salt and pepper at the end. It is thinly sliced rib-eye or sirloin steak so you don’t need to cook for too long. It is yummy on rice or noodles with veggies on the side. Then we had wild rice pudding with tropical fruits for desserts, which I liked more than the main. I don’t normally like rice pudding as a dessert, but this one is different. Wild rice or forbidden rice has a beautiful purple colour when cooked, releases a nutty perfume and gives a nice bite when you chew. It is so divine and delicious! You can add any kind of fruits on top. Bananas, caramelised pear, blueberries, passion fruit, you name it. You can also serve this for breakfast, yum! You wouldn’t be able to skip this kind of breakfast, would you? If you are not into coconut milk, use non-dairy milk such as oat milk, almond milk or soy milk. Feel free to change the recipe depending on your taste.

Black Rice PuddingIngredients

100g wild rice
200g coconut milk
1 tsp of vanilla powder
1 tsp of cacao powder
1 tsp of maple syrup
a pinch of Himalayan salt
slices of mango, strawberry, pomegranate and coconut for topping

Rinse and soak the rice for overnight or a few hours to shorten the cooking time. Add coconut milk, vanilla powder, cacao powder and a pinch of salt into the pot and bring it up to boil. Simmer for 30 minutes or until the rice is tender. Stir frequently and add more coconut milk if needed. Add maple syrup at the end. Take it off the heat and pour into the bowl. Top with your favorite fruits and serve either hot or cold.

Chocolate Bark with Candied Honey Bacon and Pepitas

Bacon ChocolateHave you had bacon in sweets? I was surprised how many sweets you can create with bacon. Bacon pretzels, bacon ice cream, chocolate bacon, bacon brownie, cupcakes topped with candied bacon… Wow they all sound quirky and amazing! I remember a friend of mine ordered the bacon on waffles with maple syrup when we had brunch together, which I thought it was a very odd combination. Then another time when Daniel and I went to his friend’s BBQ, Michelle made a bacon ice cream. It even made me a bit squeamish, how is that edible? So I had to experiment this bacon in chocolate today. Verdict? Surprisingly I don’t mind it. If you love bacon, if you love chocolate and if you love salty-sweet combination, give it a go. Maybe I can try it in brownies next time? Poor Daniel.. my ginny pig 🙂

Ingredients

4 pieces of rindless bacon
200g dark chocolate buttons
1 tbsp of honey
1/2 cup of pepitas
1 tsp of Himalayan salt
1/2 cup of coconut oil

Place bacon on a baking sheet and drizzle honey all over. Put it in the preheated oven (180) for 30-40 minutes until caramelised. Turn the bacon over about half way and add pepitas last 10 minutes. Cool it down until crisp. Melt the chocolate buttons and coconut oil either in microwave or in double-boiler until it’s all melted and smooth. Cut the bacon into pieces and arrange on a baking paper. Pour the chocolate mixture over the bacon and sprinkle toasted pepitas and salt. Place in the freezer for an hour or more to set.Once the bark is firm, break into pieces and store in the air-tight container in the fridge.

Bacon Chocolate2

GF Pumpernickel

When I started having issues with gluten and wheat, I felt so lost because I didn’t know where it came from. When I go out for brunch or eat out at the restaurant, I have a small bite of bread, which can give me a world of pain for the following few days. I developed a fear eating outside because you just don’t know what ingredients they use. Luckily most restaurants have a gluten-free menu now and you can ask for options. Hallelujah! There are many kinds of gluten-free flours available at supermarkets these days, along with many “all purpose” gluten free flour blends that are designed to be an easy to use replacement for wheat flour. I’ve made (well..played with) some gluten-free muffins and bread at home. It is hard to produce the same taste and texture like normal bread due to not using regular flours. I am still experimenting. I’ve listed a few of my favorite alternatives to wheat flour. It’s not a single substitution for wheat-free alternative flours as gluten is responsible for wheat flour’s incredible binding, stretching and rising abilities. In general, a combination of different gluten-free flours is used to create flavor, texture, and balance.

My favorite gluten-free, wheat-free flours are

  • Almond flour: Baking or cooking with this flour, made from pulverized, blanched almonds, is a surefire way to add extra bone-building calcium to your diet: A half-cup serving has 12 percent of your daily requirement–six times the amount of that in “light” whole-wheat flour. Almond flour is also high in vitamin E and monounsaturated fat. This and other nut flours — such as chestnut and hazelnut, macadamia and pistachio — add protein and vibrant taste to gluten-free baking.
  • Bean flours: Dried beans can be ground into flours as easily as grains can. Chickpea flour — also known as garbanzo bean or ceci flour — makes a memorable flatbread in the south of France. Lentil flour shows up in Indian cuisine. Even fava beans become flour, and show up in some commercial gluten-free baking mixes.
  • Rice flour: The starchiness of short-grain rice makes it the perfect candidate for rice flour. Smooth and finely ground, sweet rice flour thickens sauces and gravies so well that no one eating them can tell they are gluten-free.
  • Tapioca flour: This is also known as tapioca starch (just to confuse us). Its starchiness makes it an excellent gluten-free flour, but it must be used in combination with other flours to make great baked goods.
  • Buckwheat flour: Buckwheat is a strong, earthy-flavored flour, available in light and dark varieties. Use light-colored flour for best results in gluten-free recipes. Buckwheat flour adds protein, fiber, vitamins and minerals to gluten-free recipes and can be used to make delicious pancakes.
  • Gluten-free oats: Oats, with nutty taste and chewy texture, add protein, soluble fiber, vitamins and minerals to gluten free recipes. Use gluten-free oats and oat flour in bread, pancake, muffin, cookie, cake, granola and muesli recipes.
  • Quinoa flour: Quinoa is available as a whole seed, flakes and flour. The seed can be used to replace rice and barley in pilaf, couscous and soup recipes. Quinoa flakes can be used as a substitute for rolled oats. Quinoa flour has a somewhat strong, bitter flavor, can be used in small amounts in gluten-free mixes and baking recipes to improve nutritional quality.
  • Coconut flour: Coconut flour can be used in small quantities in gluten-free recipes to increase fiber content. It is almost 60% fiber, is high in fats and lower in carbohydrates than other GF flours. Coconut flour works best in recipes that include eggs and has a short shelf life. Refrigerate baked goods made with coconut flour to prevent spoilage.
  • Soy flour: Can be used like brown rice or corn flour. Has a heavy beany flavor and works best if used in combination with a moist flour, such as tapioca or sweet white rice flour.
  • Flaxseed meal: Substituting 1/4 of a flour mixture with flaxseed meal to add a hearty touch to whatever you are baking. Store in freezer to keep the nutritional value of these amazing little seeds.

Pumpernickel
Gluten Free Pumpernickel Loaf

Ingredients

4 eggs
33g almond meal
50g coconut flour
25g buckwheat flour
30g cocoa powder
1 tsp of ground coffee
1 tsp of baking soda
1 tbsp of apple cider vinegar
1 tbsp of coconut oil
1 tbsp of molasses
1 tsp of carraway seeds
1 tsp of cinnamon powder
a pinch of salt

Lightly beat eggs in a large bowl. Mix with coconut oil, molasses and coffee ground. Add all dry ingredients and combine well. Pour the mixture into a loaf tin and transfer to the preheated oven (180) for 30-40 minutes until cooked. Cool it down before cutting. This pumpernickel has a light and cakey texture. You can cut thinly and toast again which gives you more a crunchy, biscuit-like texture.

Spiced Cinnamon Punch (Sujeonggwa)

There is this Korean after-meal drink called Sujeonggwa. It’s commonly served after dinner because ginger helps your digestion and improves the absorption of essential nutrients in the body. Cinnamon in this drink also helps to control your blood sugar and cholesterol level and kill the bad bacteria in your GI tract so that the gastric juices work normally. So instead of going for sweets or ice creams after dinner, have this drink and maybe one of those snacking power balls. Perfect dessert and so good for your digestion!

Traditionally it is made by brewing the cinnamon sticks and sliced ginger at a slow boil and then boiled again after adding either honey or brown sugar. It’s dark brown in colour and topped with pine nuts and slices of dried persimmons. I like its subtle sweetness with a kick of cinnamon and ginger, quite different to Indian chai tea, which has a lot of mixed spices in it. I like it served cold with a couple of ice cubes in summer days. Or a bit of sparkling water to make it fizzy. It is refreshing, cleansing and hydrating! You can definitely make a healthy cocktail or non-alcoholic one with it, too. Depending on your taste, feel free add more cinnamon, ginger or honey.

Cinnamon DrinkIngredients

1L of water
8 cinnamon sticks washed
1/2 cup of sliced ginger
2 star anise
1 cup of good quality honey (or any kind of sweetener such as cane sugar, coconut sugar, maple syrup)

Put all ingredients except honey in a large pot and boil over medium heat for 30-40 minutes. Discard the ginger, cinnamon and star anise. They’ve done their job now. Add honey into the pot and boil for another 20 minutes. Cool it down before you serve. You can top with pine nuts, slices of dried persimmon or dates for garnish.

Date Power Balls

Chocolate Date BallsI didn’t know what Medjool dates were until I started making these power snack balls. Maybe I didn’t get my hands on because they didn’t look that attractive at the shops. They are soft, sticky and sweet, great for making healthy raw desserts.

Dates give extra energy to a tired body within half an hour after taking it. So having powder date balls will boost your stamina before exercise and keep your energy levels between meals. They contain minerals and vitamins – oil, calcium, sulfur, iron, potassium, phosphorous, manganese, copper and magnesium which are advantageous for health. They also help in fighting constipation due to high dietary fibre content, intestinal disorders, heart problems, diarrhea and abdominal cancer. Apparently Muslims break their fast by eating dates and water according to their traditions. Breaking fast with eating dates helps to avoid overeating of the food after the fast because the feeling of hunger gets pacified. So you can see eating dates helps to control your hunger here.

How to use them? Medjool dates taste incredibly sweet and caramel-like. My favorite way of using them is in baking and making sweets. They definitely help to satisfy your sweet tooth without any refined sugar. You can eat them just by itself as a snack on the go. They don’t need refrigeration and stand up well to travel. It is originally grown in Morocco, so goes well with Moroccan spices like cumin, cardamom, turmeric and saffron. Put them in savoury dishes like couscous salads, stuffing, tagine, casserole, etc. It will add a beautiful natural sweetness to the dishes.

Ingredients

50g mixed nuts (almonds, walnuts, cashews) – Feel free to use any types of nuts that you have on hand.
8 Medjool dates
50g oats
50g dark chocolate buttons
30g chia seeds
25g maca powder
25g almond meal
1 tsp of cacao powder
1 tsp of cinnamon powder
1 tbsp of coconut oil
a pinch of Himalayan salt

Add all ingredients to a food processor and pulse until completely combined. Pour the mixture into a bowl. Roll them into balls until all the mixture has been used. Add a bit of water if the mixture is too dry or add more almond meal if too wet. You will need to squish it together so that it sticks. Damp hands can help the rolling process. Refrigerate them in an airtight container until needed.