Broiled Grapefruit with Cinnamon Cottage Cheese

It can be quite warm or cold in March being a transition from summer to autumn in Perth. One day it is 30+ degrees, next day it drops down to 20. How crazy is that? I took advantage of the cool morning making these broiled grapefruit beauties for a snack. I never made or tasted it before, so was curious about how it would turn out. It is simple to make though I was so impressed with its bittersweet flavour and radiant pink colour. Perfect brunch or snack for chilly weather when it’s served warm with a bit of cheese or yogurt. Highly recommended!

Broiled GrapefruitIngredients

1 Grapefruit
1 tsp of maple syrup or agave or honey
1/2 tsp vanilla bean powder
1 tsp of cinnamon powder
100g cottage cheese

Wash the grapefruit and cut it in half. Cut around the outside of the grapefruit to loosen them. Drizzle maple syrup. Broil for about 3-5 minutes until caramelised on top (don’t burn!). Serve warm with cottage cheese and sprinkle of cinnamon and vanilla. Other serving options? with yogurt, granola, breakfast muffin.

Mini Hummingbird Bundt Cake

Hummingbird Cake
Hummingbird cake
is a banana pineapple spice cake with a cream cheese frosting from the United States. I have no idea why it is called Hummingbird cake and no one does? The recipe was published by Mrs. Wiggin in Southern Living Magazine in 1978 and was elected the magazine’s favorite recipe in 1990. Some say that the cake is so delicious it makes you hum with happiness while others think the cake is named because it’s sweet enough for hummingbirds (hummingbirds will select only the sweetest of nectar to drink). The first one sounds good to me 🙂 I made little changes to the traditional recipe using coconut oil instead of vegetable oil, reducing the amount of sugar (hummingbirds might not like this), using coconut sugar instead of brown sugar, using flaxseed meal instead of eggs and cottage cheese for frosting. It is similar to making a carrot cake, simply mixing all wet ingredients and dry ingredients, no stand mixer needed. Either making with the traditional recipe or making changes like me, it is lovely using fruits and veggies in baking, a little healthier I guess. And the house smelled incredible while it was being baked in the oven. Beautiful moist flavoursome cake! Try today or weekend…

Hummingbird Cake1Ingredients

150g self-raising flour
50g fine dessicated coconut
50g coconut sugar
1 grated carrot
1 mashed ripe banana
1/4 cup chopped pineapple
1/4 grounded walnut
1 tbsp of coconut oil
1 tsp of molasses
1 tsp of vanilla bean powder
1 tsp of cinnamon powder
1 tsp of coriander ground
1 tsp of baking powder
1/2 tsp of baking soda
100g milk
10g flaxseed meal
a pinch of Himalayan salt

For frosting
1 tbsp of low fat cottage cheese
1 tbsp of raw honey
a handful of walnuts

Preheat the oven to 180. To make flax “eggs”, mix flaxseed meal and milk in a bowl and set aside. Combine grated carrot, mashed banana, coconut oil, coconut sugar and molasses in a separate bowl and then mix with flax “eggs”. Add all dry ingredients (sifted flour and spices) into the wet mixture. Stir to combine with a spatula. Pour the mixture into a prepared baking tin and bake in the oven for 30-40 minutes until cooked. Cool it down and spread frosting on top.

Home Made Granola

Granola
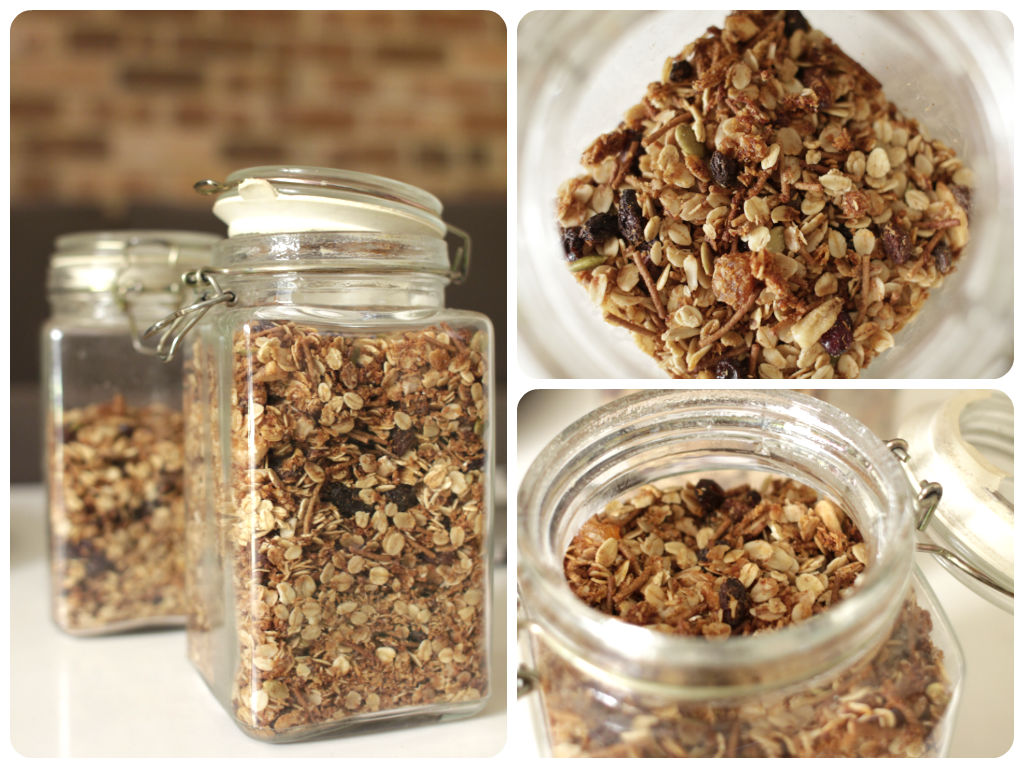
I used to be obsessed with oats for breakfast. Granola with milk or yogurt, quick oat porridge, oat muffins, etc. It is whole grains and healthy, gives you energy in the morning, yeah! Oats may contain gluten though so if you are gluten-sensitive like me, you need to look for gluten-free oats. Granola is baked rolled oats cereal with nuts and dried fruits. My hubby has a bowl of granola with milk for breakfast, and I normally pick on it when I feel like snacking during the day (Yes, I have been getting my hands on his jar during the day. Sorry Daniel!). Store-bought granola can be loaded with sugar and oil. It is best to make your granola at home to limit the amount of sugar and fat contents. Or look for low-fat granola if you choose to buy from the shops.

Granola has a number of health benefits – fibre, healthy fats, vitamins and minerals. Main ingredients of granola, oats, bran and nuts, contain a good amount of fibre which helps to regulate digestion and prevent constipation. It also controls your blood sugar level and keeps you feel full longer. Good fats from nuts, seeds and coconut oil helps to lower cholesterol, blood pressure and reduce inflammation. Omega-3 fatty acids, a type of polyunsaturated fatty acid, in granola are essential for proper brain function. Granola also contains vitamin E which acts as antioxidant, thiamin and folate which helps energy metabolism and nerve function. Essential minerals such as magnesium, phosphorus, zinc, copper, manganese and selenium are also found in granola.

The recipe is so versatile. You can pretty much add any of your favorite nuts, seeds and dried fruits in the home made granola. Easy, and way cheaper than the store bought kinds!

Granola1
Ingredients

3 cups rolled oats
1/2 cup dessicated coconut
1/4 cup wheat bran
1/4 cup pepitas
1/4 cup dried pineapples
1/4 cup raisins
1/4 cup dried cranberries
1/2 cup honey
1/2 cup coconut oil
1 tbsp molasses
1 tbsp ground cinnamon
1 tbsp cacao powder
1 tsp fine sea salt

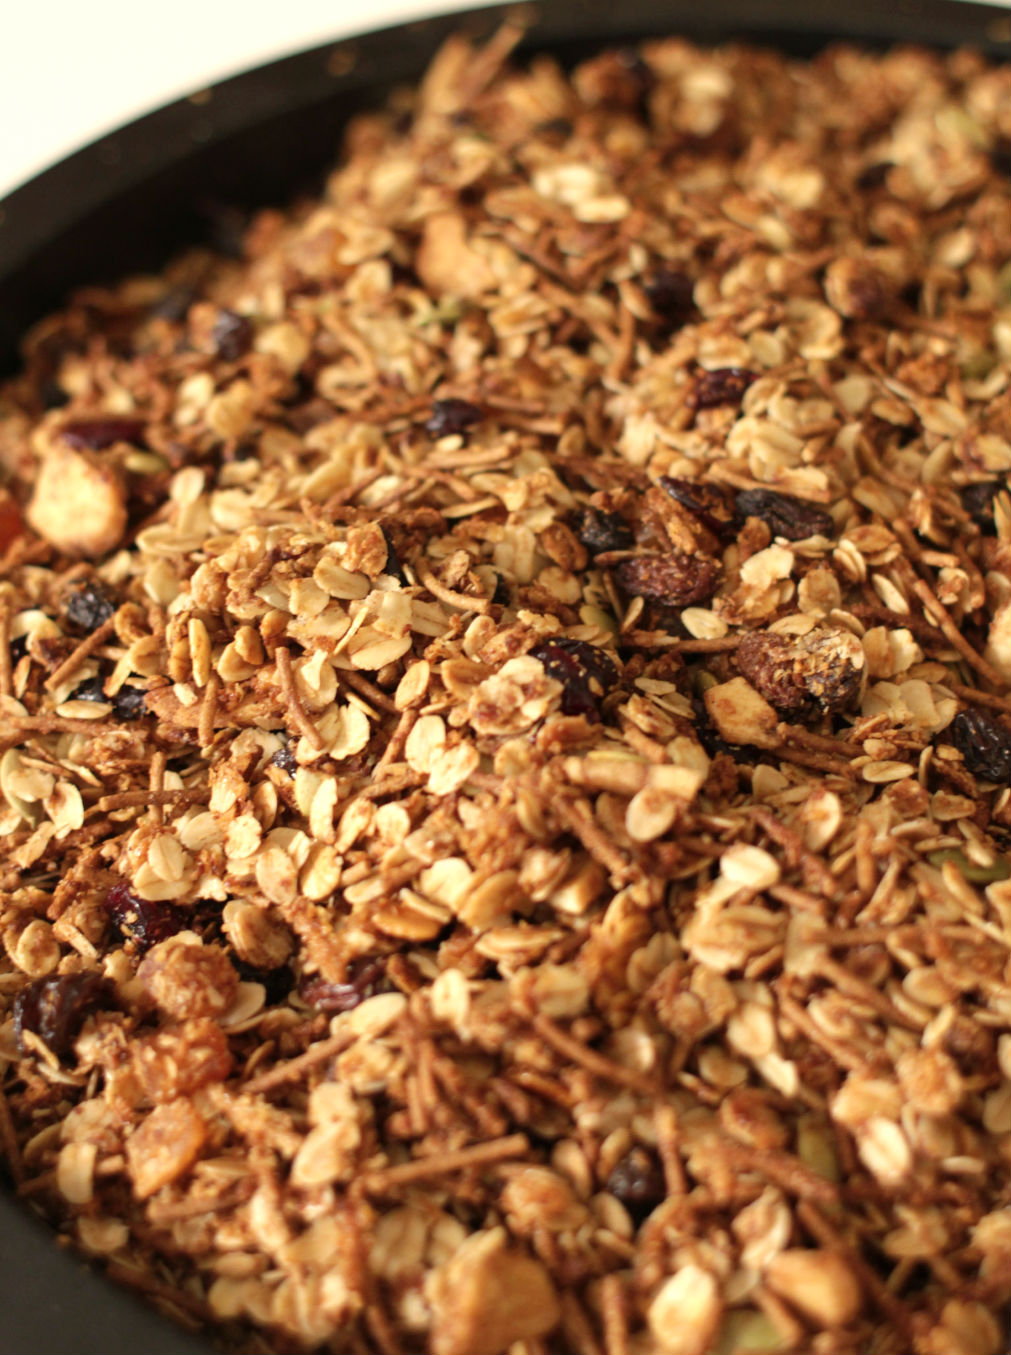
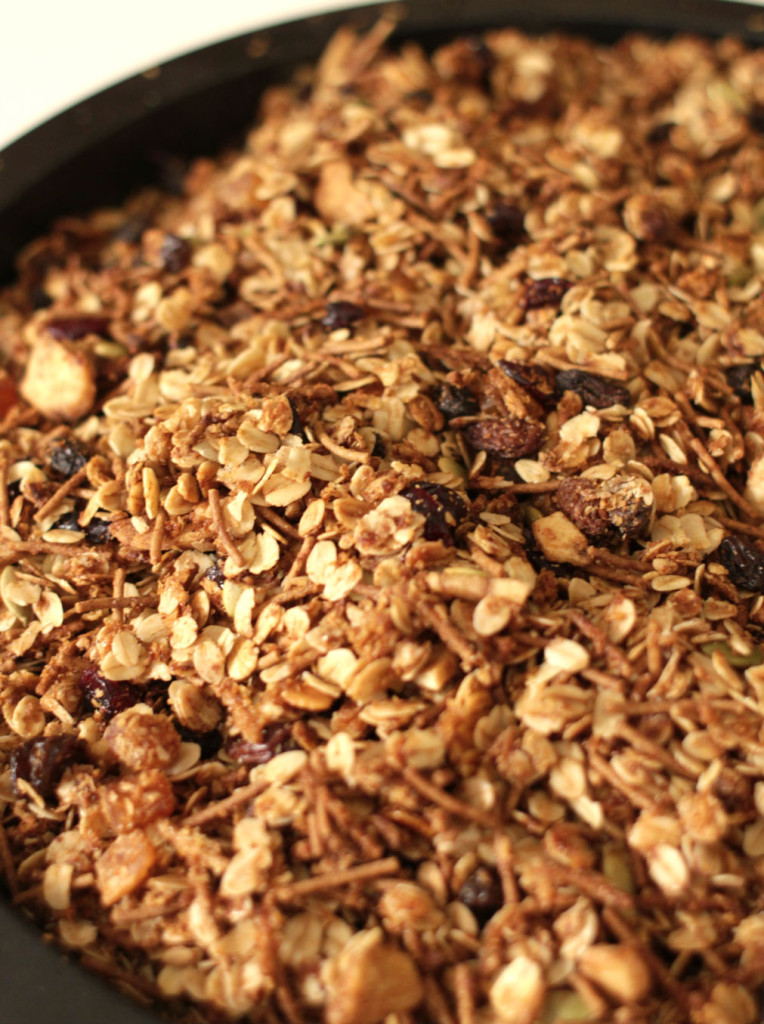
In a large mixing bowl, mix together the oats, coconut and wheat bran. Add the wet ingredients in a saucepan over medium heat and stir well. Add the wet mixture (while still warm) to the dry mixture and stir making sure that all of the dry ingredients are fully coated with the wet ingredients. Spread onto a pan lined with baking paper and bake in the oven (180) for 45 minutes. Remove the pan from oven every 10 minutes and stir for even baking and crispiness. Cool granola before pouring into a bowl and adding dried fruits. It will crisp up as it cools.

Chocolate Bark with Candied Honey Bacon and Pepitas

Bacon ChocolateHave you had bacon in sweets? I was surprised how many sweets you can create with bacon. Bacon pretzels, bacon ice cream, chocolate bacon, bacon brownie, cupcakes topped with candied bacon… Wow they all sound quirky and amazing! I remember a friend of mine ordered the bacon on waffles with maple syrup when we had brunch together, which I thought it was a very odd combination. Then another time when Daniel and I went to his friend’s BBQ, Michelle made a bacon ice cream. It even made me a bit squeamish, how is that edible? So I had to experiment this bacon in chocolate today. Verdict? Surprisingly I don’t mind it. If you love bacon, if you love chocolate and if you love salty-sweet combination, give it a go. Maybe I can try it in brownies next time? Poor Daniel.. my ginny pig 🙂

Ingredients

4 pieces of rindless bacon
200g dark chocolate buttons
1 tbsp of honey
1/2 cup of pepitas
1 tsp of Himalayan salt
1/2 cup of coconut oil

Place bacon on a baking sheet and drizzle honey all over. Put it in the preheated oven (180) for 30-40 minutes until caramelised. Turn the bacon over about half way and add pepitas last 10 minutes. Cool it down until crisp. Melt the chocolate buttons and coconut oil either in microwave or in double-boiler until it’s all melted and smooth. Cut the bacon into pieces and arrange on a baking paper. Pour the chocolate mixture over the bacon and sprinkle toasted pepitas and salt. Place in the freezer for an hour or more to set.Once the bark is firm, break into pieces and store in the air-tight container in the fridge.

Bacon Chocolate2

GF Pumpernickel

When I started having issues with gluten and wheat, I felt so lost because I didn’t know where it came from. When I go out for brunch or eat out at the restaurant, I have a small bite of bread, which can give me a world of pain for the following few days. I developed a fear eating outside because you just don’t know what ingredients they use. Luckily most restaurants have a gluten-free menu now and you can ask for options. Hallelujah! There are many kinds of gluten-free flours available at supermarkets these days, along with many “all purpose” gluten free flour blends that are designed to be an easy to use replacement for wheat flour. I’ve made (well..played with) some gluten-free muffins and bread at home. It is hard to produce the same taste and texture like normal bread due to not using regular flours. I am still experimenting. I’ve listed a few of my favorite alternatives to wheat flour. It’s not a single substitution for wheat-free alternative flours as gluten is responsible for wheat flour’s incredible binding, stretching and rising abilities. In general, a combination of different gluten-free flours is used to create flavor, texture, and balance.

My favorite gluten-free, wheat-free flours are

  • Almond flour: Baking or cooking with this flour, made from pulverized, blanched almonds, is a surefire way to add extra bone-building calcium to your diet: A half-cup serving has 12 percent of your daily requirement–six times the amount of that in “light” whole-wheat flour. Almond flour is also high in vitamin E and monounsaturated fat. This and other nut flours — such as chestnut and hazelnut, macadamia and pistachio — add protein and vibrant taste to gluten-free baking.
  • Bean flours: Dried beans can be ground into flours as easily as grains can. Chickpea flour — also known as garbanzo bean or ceci flour — makes a memorable flatbread in the south of France. Lentil flour shows up in Indian cuisine. Even fava beans become flour, and show up in some commercial gluten-free baking mixes.
  • Rice flour: The starchiness of short-grain rice makes it the perfect candidate for rice flour. Smooth and finely ground, sweet rice flour thickens sauces and gravies so well that no one eating them can tell they are gluten-free.
  • Tapioca flour: This is also known as tapioca starch (just to confuse us). Its starchiness makes it an excellent gluten-free flour, but it must be used in combination with other flours to make great baked goods.
  • Buckwheat flour: Buckwheat is a strong, earthy-flavored flour, available in light and dark varieties. Use light-colored flour for best results in gluten-free recipes. Buckwheat flour adds protein, fiber, vitamins and minerals to gluten-free recipes and can be used to make delicious pancakes.
  • Gluten-free oats: Oats, with nutty taste and chewy texture, add protein, soluble fiber, vitamins and minerals to gluten free recipes. Use gluten-free oats and oat flour in bread, pancake, muffin, cookie, cake, granola and muesli recipes.
  • Quinoa flour: Quinoa is available as a whole seed, flakes and flour. The seed can be used to replace rice and barley in pilaf, couscous and soup recipes. Quinoa flakes can be used as a substitute for rolled oats. Quinoa flour has a somewhat strong, bitter flavor, can be used in small amounts in gluten-free mixes and baking recipes to improve nutritional quality.
  • Coconut flour: Coconut flour can be used in small quantities in gluten-free recipes to increase fiber content. It is almost 60% fiber, is high in fats and lower in carbohydrates than other GF flours. Coconut flour works best in recipes that include eggs and has a short shelf life. Refrigerate baked goods made with coconut flour to prevent spoilage.
  • Soy flour: Can be used like brown rice or corn flour. Has a heavy beany flavor and works best if used in combination with a moist flour, such as tapioca or sweet white rice flour.
  • Flaxseed meal: Substituting 1/4 of a flour mixture with flaxseed meal to add a hearty touch to whatever you are baking. Store in freezer to keep the nutritional value of these amazing little seeds.

Pumpernickel
Gluten Free Pumpernickel Loaf

Ingredients

4 eggs
33g almond meal
50g coconut flour
25g buckwheat flour
30g cocoa powder
1 tsp of ground coffee
1 tsp of baking soda
1 tbsp of apple cider vinegar
1 tbsp of coconut oil
1 tbsp of molasses
1 tsp of carraway seeds
1 tsp of cinnamon powder
a pinch of salt

Lightly beat eggs in a large bowl. Mix with coconut oil, molasses and coffee ground. Add all dry ingredients and combine well. Pour the mixture into a loaf tin and transfer to the preheated oven (180) for 30-40 minutes until cooked. Cool it down before cutting. This pumpernickel has a light and cakey texture. You can cut thinly and toast again which gives you more a crunchy, biscuit-like texture.